Tuesday, July 5, 2016

Tuohipää puukkos for sale! ( SOLD )

Finnish word tuohi means birch bark. Pää means head, is also used when speaking of knife handle. 7 bark handle knives for sale this time. Bark flaps are compressed between brass bolster plates, no glue used. 80CrV2 carbon steel rhombic cross section blades, scandi grind with small secondary. Dark brown leather sheaths with wooden liner for the blade.


Nr1   100*21,3*4,8mm blade. Handle 110*30*22,5mm. SOLD!


____________________________________________________________________________________________________________


Nr2   86*20*4,6mm blade. Handle 110*30*21,5mm.  SOLD!


______________________________________________________________________________________________________________


Nr3    96*21,7*4,8mm blade. Handle 110*30,5*22mm.  SOLD!


____________________________________________________________________________________________________________


Nr4   85*20,5*4,6mm blade. Handle 110*29*22,5mm.  SOLD!


_____________________________________________________________________________________________________________


Nr5    97*21*4,6mm blade. Handle 107*30*21,5mm. Darker bark. SOLD!

___________________________________________________________________________________________________________


Nr6    97*21*4,9mm blade. Handle 110*30,5*22,5mm. Darker bark. SOLD!

__________________________________________________________________________________________________________


Nr7     97*22*4,9mm blade. Handle 105*30*22,5mm. SOLD!


Sunday, July 3, 2016

A sheath-knife needs a sheath.


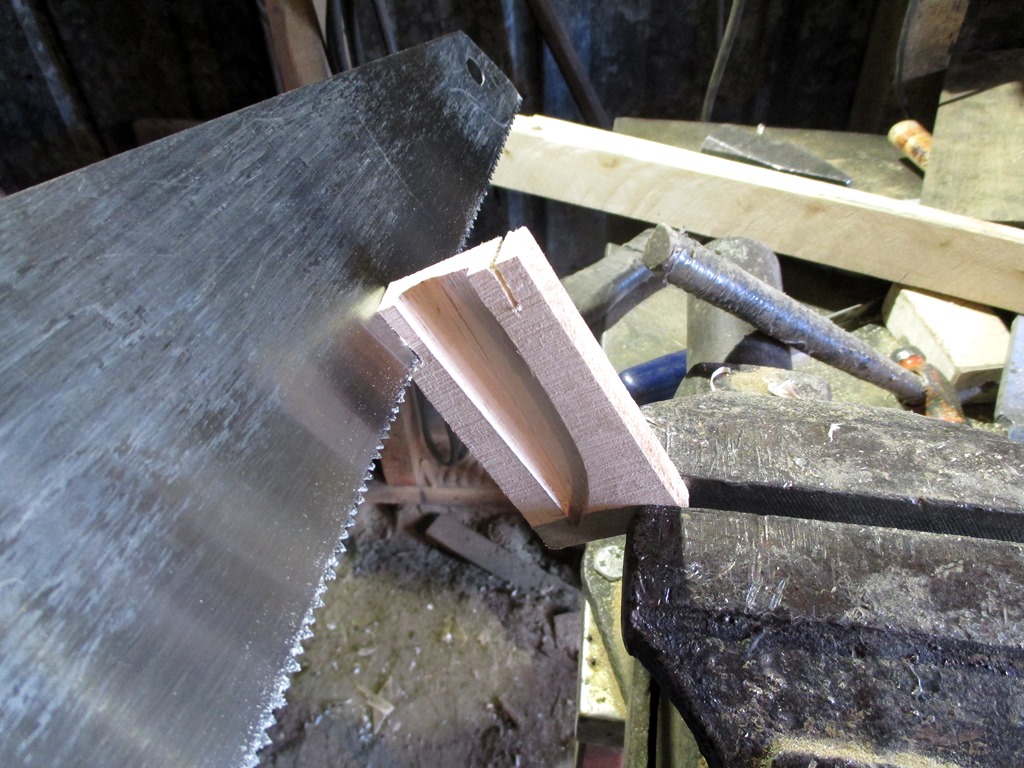
Making a typical Finnish style back sewn sheath starts with making a wooden liner. Blade profile is drawn on a birch strip and lines are cut with a knife.

Carved out with a chisel. A rhombic cross section blade, that's why a slightly v-shaped slot.

Sawn off.

Shaped on a belt sander.

Back side is made of birch plywood. Pieces are glued together, then sanded to final shape.

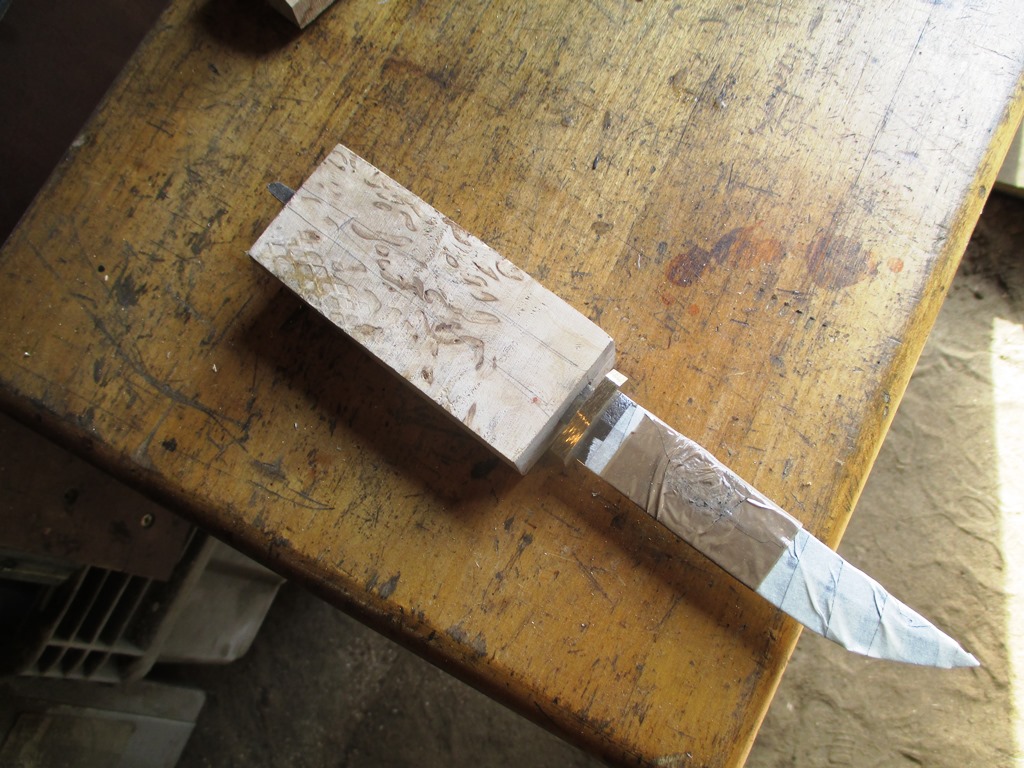
Edge is taped and the whole knife wrapped in plastic foil.

Vegetable tanned hide is cut. Mouth section is thinned to be folded before starting to sew. Leather is soaked in warm water, just a while is enough.

I start stitching from the mouth end. Few holes with an awl, stitch, and so on. To make a locking sheath for a barrel shaped handle the mouth has to go a bit over the widest part of the handle.

Sewing done. Now the sheath can dry a bit, then being wet formed. Wet forming is most effective when the sheath feels a bit dry already. Seam is glued and trimmed. 

To complete the work there's several stages to go still. Making the belt loop and brass d-ring, dyeing, rubbing leather cream on, and polishing the blade and brass bolster plates. 

From this set there will be 7 bark handle knives for sale. Should get them posted here late Tuesday evening Finnish time. If you're interested in getting one, stay tuned!


Thursday, June 30, 2016

Leisure & work.


I spent last weekend on Lake Inari again. This time with my girlfriend and the dogs Pyry and Kumu. 


As a small dog Kumu can be pretty much where ever in the canoe, doesn't make much diffrence. Pyry being a medium sized dog, 24-25kg, would change the balance when moving around. So his place is usually right in front of me.


As you might have seen in my canoe trip post a while ago, this is pretty much what most of the scenery on Inari Lake is. Rocky, pine forests, and not that many summer houses. A nice real wilderness lake.


Paddling, fishing... No further plans for the trip. Again grayling, a common catch around the rocky islands.


Pyry waiting if there's more fish to come. An old dog knows what to expect....


We checked the open wilderness hut of Kahkusaari, and stayed overnight as well.


Yeah, that's cosy, right? Like there wouldn't be space anywhere else....


On Monday it was time to get back to work, so off to the bark handle making we go! Cutting the bark in appr 3x4cm flaps, cleaning them, making holes for the tang, piling them on the tang....

Bark squares are piled on the tang, tightened after every 2 to 4 flaps. Then the whole pile is tightened with a bit more power still, and few flaps more added. Sometimes it feels like it wouldn't tighten anymore, but waiting for a minute or two and then trying again it suddenly goes a bit more.

Tightly fitted rear plate is added, hammered on the tang, tang cut, and slightly peened. At this point the handle is 1,5 to 2 cm longer than the planned final length. Warming it up in a kitchen owen in 75 to 100 celcius for 45-60 mins makes the oil in the bark softer, so the final tightening get's easier.

Straight from the owen the blade is attached tightly on a vice, and the butt plate is forced down the tang with a hammer and wooden block. Planned length is appr. 11cm on this, so a bit more to go still. Tang needs to be shaped slightly tapered, so the brass plate will stay tigh all the way when forced on the tang. Proper fit of the tang and butt plate is the key for constructing a handle this way. If it gets loose, it means more work, but can be still done of course.

Tang is cut, and filed so it's just slightly above the butt plate. Then the same process as always with this kind of handle construction; take a ball-pein hammer, peen, file, peen, file....

Here's the result. No glue used, so you can start shaping and finishing the handle right away if you like.

Handles of this set roughly shaped on a belt sander, next moving to hand sanding. To be continued!


Friday, June 24, 2016

A bit of puukko work before the weekend.


Knives you saw on the previous post are under some handle work.

Three of the blades were to get a curly birch handle. Blades and front sides of bolster plates are polished. Blades masked with tape. Curly birch blocks are cut, ends levelled, tang lines drawn.

I drill with regular lenght drills from both ends of the block. First two holes, then moving the drill to form a slot.

Same from the other end, sighting from top and side to follow the lines, and make the holes connect.

Needle rasps complete the work.

Checking every now and then to get a straight fit for the blade. Last centimeter or half is fitted with a punching block and hammer. I use a thin leather or birch bark spacer between the brass and wood. These get leather spacers.

Roughly shaping on a belt sander.

Then it's time to fit the butt bolster plate. Same tools as before, a drill and needle rasps.

I make a countersunk hole, so the tang would form a strong rivet when peened.

Ready for glueing. Parts are take off, then assembled back with slow cure epoxy.

Knife is tightened on a vice, back plate hammered down, end of the tang is cut.

End of the tang is peened with a ball pein hammer. Hammering, filing, hammering, filing....

Result looking like this.

I use worn out coarse grit belt to slightly sand the shape out, to see that everything fits straight after the peening is complete. Using a sharp belt would only ruin it, as the open epoxy will stick on it. Now the glue is let to set properly.

Rest of the blades in this set will get birch bark handles, so at this point the back plates were fitted.

Last work of the day was to cut some birch bark. To be continued after the weekend!